Audi A5/S5 MMI hack for Bluetooth Audio A2DP Streaming
So as many people will know, Audi are Apple fan boys.
I....am not.
So although Audi have an MMI cable available for 3.5mm and iOS devices, I wanted something easier and quicker plus I don't want my phone stuck in the glove box when its attached to music... that would be ridiculous. So I set about looking for ways to get the audio streaming to my Audi and my 3G MMI via bluetooth from any device. I currently have a One Plus One (edit, now a One Plus Tw0) handset and an iPhone 5 (edit iPhone 6) but as I have Google All Access and a Three all you can eat data plan, the One plus is the go to device. The iPhone is works.
All in all it was fairly easy once I'd been given pointers from a guy at work (and as I work in AV these were fairly accurate and explicit instructions). I couldn't find anything online worth whilst except for a stupidly expensive visioo thing that basically does what this hack does for shed loads more cash from what I can see.
So I wanted to share this with you in case you too are frustrated about not being able to stream Bluetooth music to your car. This is basically a simple way to stream music from any device via Bluetooth. It will also allow your phone to still take calls as the music is streamed to the MMI and the calls to the phone BT.
There is a kit list:
Then just do this (click the pictures to enlarge):


YOU MUST BE CAREFUL HERE. DO NOT BREAK THE CLIPS and also REMEMBER WHICH PORTS IT COMES OUT OF as you need to get it back in. The resistor is the thicker black cable. You can see the bulge of the resistor in it like a python after its just eaten! Gently move the plastic away from the lips and the resistor will come out exactly as the data wires did. We can no reuse the tips from this on our resistor so just snip them off and we will solder them to the new 1k Ohm resistor.


Reattach the resistor in the same ports you took it out of! It should clip nicely back in as you didn't break anything and you soldered the tips on neatly. When you have the resistor back in then you simply need to tuck the folded data wires away and put everything back in the casing, ready to put the plastic sheath over it all. You can see here I have fixed the lid clips so it all seals up nicely.

Hope that helps and you get the enjoyment of music .. wirelessly!
I....am not.
So although Audi have an MMI cable available for 3.5mm and iOS devices, I wanted something easier and quicker plus I don't want my phone stuck in the glove box when its attached to music... that would be ridiculous. So I set about looking for ways to get the audio streaming to my Audi and my 3G MMI via bluetooth from any device. I currently have a One Plus One (edit, now a One Plus Tw0) handset and an iPhone 5 (edit iPhone 6) but as I have Google All Access and a Three all you can eat data plan, the One plus is the go to device. The iPhone is works.
All in all it was fairly easy once I'd been given pointers from a guy at work (and as I work in AV these were fairly accurate and explicit instructions). I couldn't find anything online worth whilst except for a stupidly expensive visioo thing that basically does what this hack does for shed loads more cash from what I can see.
So I wanted to share this with you in case you too are frustrated about not being able to stream Bluetooth music to your car. This is basically a simple way to stream music from any device via Bluetooth. It will also allow your phone to still take calls as the music is streamed to the MMI and the calls to the phone BT.
Covering my ass statement: Anything you do from these directions is entirely your own doing and I accept no responsibility. Especially for you cutting the wrong cable, messing up your cable, sticking holes in your kitchen table or melting your car
There is a kit list:
- An Audi MMI cable like this:

- A 30pin bluetooth A2DP receiver (the type you use with iPod stands etc as it needs to attach to the MMI cable)
- 1 x 1k Ohm resistor
- Thin flat head driver
- Some wedges (tesco club card, other small drivers, guitar pick etc to hold the clip open)
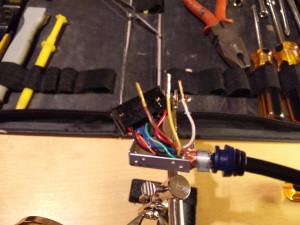
- A soldering iron with applicable soldering kit
- Electrical tape
- Needle nose pliers or the likes
- Something to cut the wires with
- A delicate hand
Then just do this (click the pictures to enlarge):
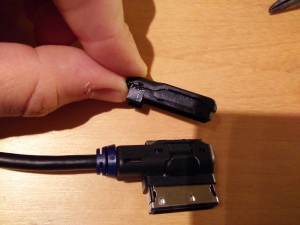
- You need to pop open the plastic casing from the 30 pin end of the MMI Cable. To do this you need to put pressure on here first to get the casing open enough to shove something in. This is just above the pressure clip to remove the cable when its plugged into the car.


- When you have that open, put a wedge in to hold it open and work your way to the bits that are holding it all in place. You can use a small flat head to press the clips in if you are lucky.. only one of mine did this. Basically you need to work your way round gently to prise the lid off

- Eventually your lid will be off. Step one done. You can see in this picture how there is one of the clips damaged and laid down in the lid. I had to plasweld/superglue these back in place.

- Now, slide down the plastic sheath off the MMI connection and you will have this


- The picture on the right you can see two impressions in eh middle. This is where the metal casing is held in place and it should easily pop apart. Be careful though as some of the metal edges are sharp.
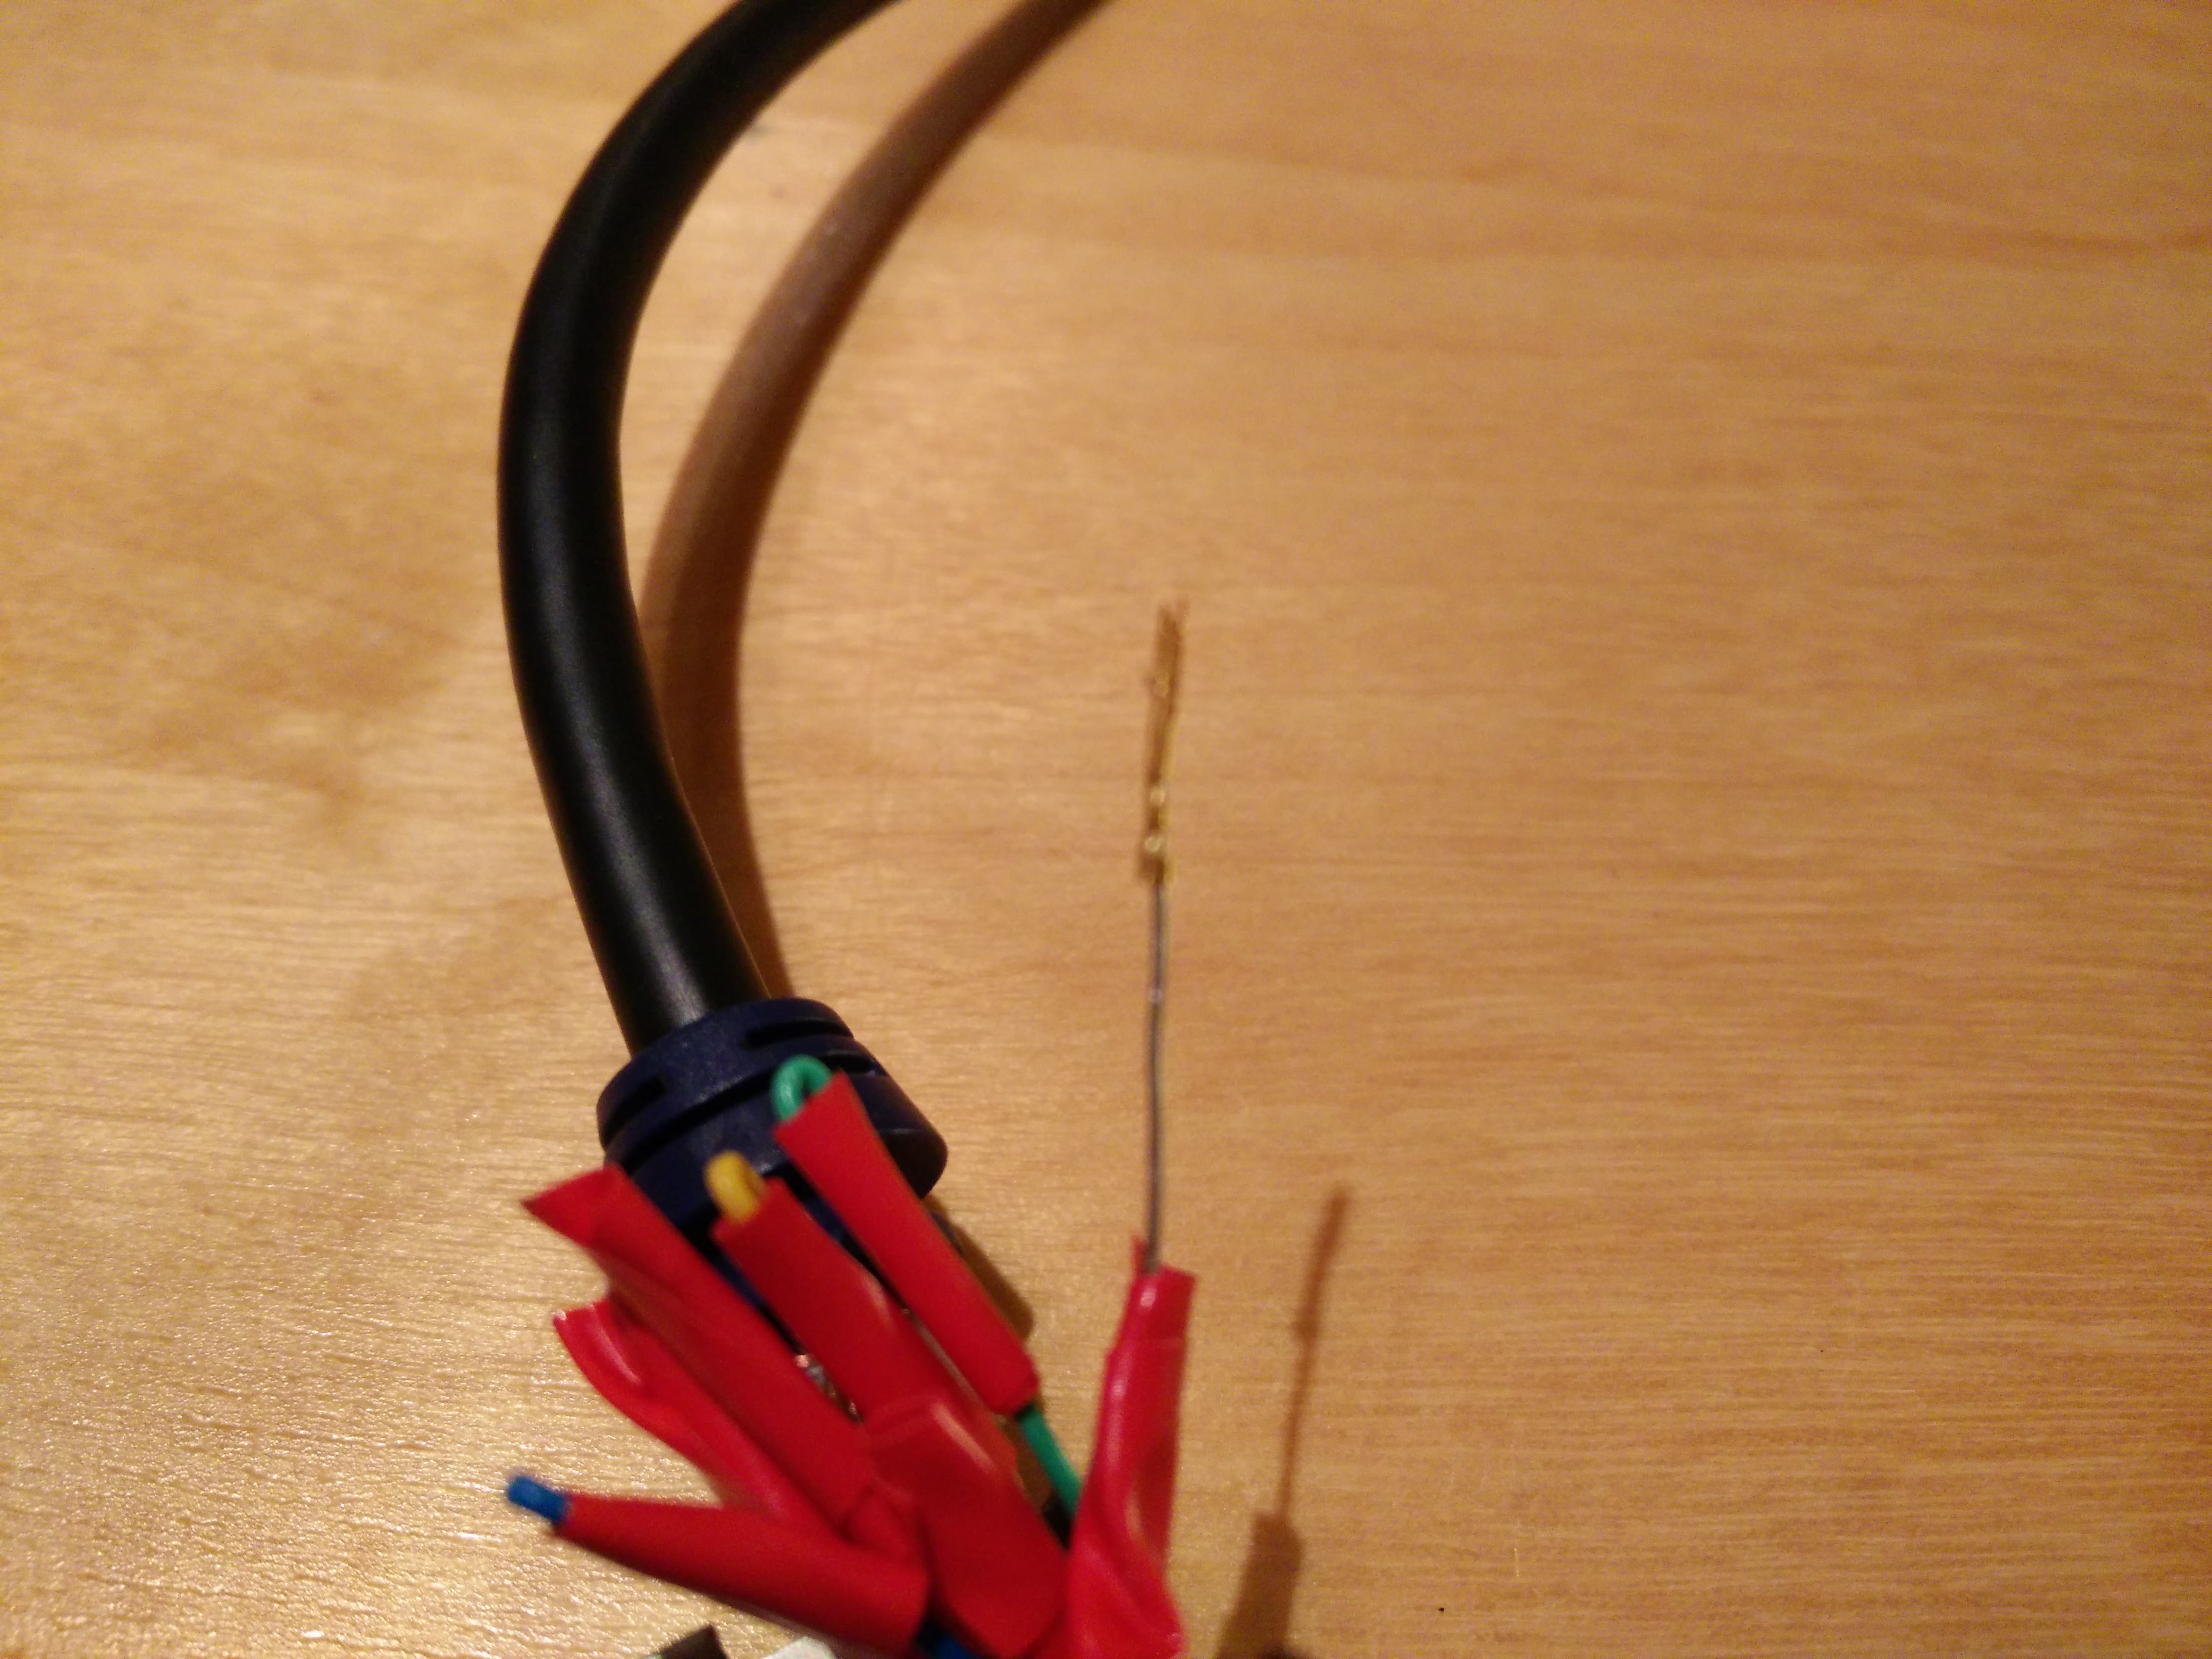
- Hey presto we now can get to the wiring so you can see below the sets of wires we need to work on. The group of 3 (brown, yellow and white) carry data information and we don't need them, and the black coated wire is the current resistor. This is what tells the car what device is plugged in basically. Everything you see in this picture is mirrored on the other side of the unit.

- Here you should be VERY gentle with things if you want a tidy job and no issues with the cable in the future. You can see in the picture above the cable going in, the black plastic and then the gold of the connector. Each of the cables going into this are held in place my a TINY TINY lip on the gold tips. You may well need these so you can't just yank the cables from the unit as you'll damage everything. They are fairly easy to remove though thankfully. Take your small flat head driver and gently push the small plastic panel to the side or pull it towards you as that will mean the lip has nothing to hold on to. It is easier to push to the side but also more likely to break. Its not the end if it breaks so don't worry too much as we arent plugging cable back in theres ports. You should then be able to gently pull the cable with your needle nose pliers and remove it from the block.

- Once they are out you need to isolate them so fold them over and tape them up. You should have 3 out on this side in the first go and then more to come on the other side.

- Now you need to flip it over and remove the other three wires in the same positions, tape them all off and you end up with something like this, nicely insulated.

- Right, now we need the existing resistor out.
YOU MUST BE CAREFUL HERE. DO NOT BREAK THE CLIPS and also REMEMBER WHICH PORTS IT COMES OUT OF as you need to get it back in. The resistor is the thicker black cable. You can see the bulge of the resistor in it like a python after its just eaten! Gently move the plastic away from the lips and the resistor will come out exactly as the data wires did. We can no reuse the tips from this on our resistor so just snip them off and we will solder them to the new 1k Ohm resistor.

- For some reason I didn't take any photos of the soldering section but I've explained what you need above. We want the tips as we need these to hold the new resistor in place. You should basically make your Frankenstein resistor to look like this. I have one short end as that's how it came out originally from the previous resistor in the unit. You can snip shorter if you want.

- Again, you want to protect this from shorting so wrap it. Then you will end up with a medusa!
Reattach the resistor in the same ports you took it out of! It should clip nicely back in as you didn't break anything and you soldered the tips on neatly. When you have the resistor back in then you simply need to tuck the folded data wires away and put everything back in the casing, ready to put the plastic sheath over it all. You can see here I have fixed the lid clips so it all seals up nicely.

- Once you have it all back together again, it should look pretty much as it did when you started but probably with a few scratches from when you tried to open the clip ;)

- Now, plug your MMI cable into your car, add your BT adapter and press Media. You should see AUX connection on the screen and now you are ready to stream to the Bluetooth adapter. (pairing to the adapter is simple so you are on your own for that) . I had no need to do any VAGCOM editing or the likes.
Hope that helps and you get the enjoyment of music .. wirelessly!


Comments
Post a Comment